Taking on a whole-home renovation can feel like walking a tightrope between creative design and complex logistics. Too often, homeowners tackle projects piecemeal: they replace a floor here, update a vanity there, and plant a garden bed out front, only to realize that the overall aesthetic feels disjointed or that later structural work ruins fresh finishes. A successful modernization requires a holistic strategy where exterior durability, curb appeal, and interior comfort inform one another. When approached systematically, a full-scale renovation does more than refresh tired finishes—it fortifies your property against weather extremes, lowers monthly utility bills, streamlines daily routines, and substantially increases overall equity.
The secret to keeping a large-scale renovation on budget and on schedule lies in the sequencing. Tackling tasks in the wrong chronological order leads to redundant labor, wasted materials, and needless frustration. Fine interior finishes will inevitably suffer if heavy exterior demolition is still underway, just as delicate sod or flowerbeds will be destroyed if heavy delivery trucks still need yard access. This master checklist organizes your renovation into an actionable, step-by-step roadmap. By following this phased approach, you can balance exterior resilience with refined living spaces while keeping trades organized and momentum steady from start to finish.
Phase 1: Establishing the Jobsite and Securing Structural Foundations
Before swinging a single sledgehammer or demoing drywall, you must establish clear operational boundaries across the property. A full remodel turns your home into an active commercial construction site. Without an organized staging strategy, driveways crack under the weight of supply flatbeds, interior pathways get tracked with debris, and subcontractors waste billable hours searching for tools and materials.
-
Designating clear perimeter zones: Map out dedicated areas for dumpster drop-offs, lumber drops, and subcontractor parking. Keep raw materials elevated on wooden pallets and covered with heavy-duty tarps to prevent ground moisture from ruining subflooring and framing timber.
-
On-site worker sanitation: Protecting your primary residential bathrooms from muddy boots and heavy dust is a practical necessity. Securing a clean portable toilet for the perimeter ensures your personal living areas remain private, prevents sewer strain during plumbing rough-ins, and keeps you compliant with local building site ordinances.
-
Protecting existing mechanicals: Seal off heating and cooling return vents with plastic sheeting and magnetic covers before demolition begins. Letting fine drywall dust enter your ductwork can shorten HVAC blower motor lifespans and circulate allergens for months after project completion.
Once site logistics are secured, direct your focus to the home’s bones. Older residential properties frequently feature awkward, compartmentalized rooms, sagging floor joists, or undersized ceiling headers that cannot handle modern wide-span openings. Structural issues must be engineered and resolved before any decorative surface work commences.
-
Assessing load paths: Work closely with an engineer to examine how ceiling loads transfer down through wall studs to foundation footings. Removing walls to create open-concept living requires calculating beam deflections and sizing steel or glue-laminated posts appropriately.
-
Specialized heavy structural framing: For dramatic architectural features—such as open vaulted living rooms, timber-lined cathedral ceilings, or heavy-truss front porticos—partnering with a licensed local timber frame contractor guarantees that heavy joinery, mortise-and-tenon connections, and structural timber bents are milled and installed to exact load tolerances.
-
Correcting subfloor deflections: Sistering cracked joists and leveling low spots at this stage guarantees that future tile, stone, and wide-plank hardwood floors will not crack, creak, or separate once installed.
Phase 2: Fortifying the Building Envelope and Storm Readiness
A beautiful interior is only as secure as the exterior shell surrounding it. Upgrading your building envelope safeguards your capital investment against severe weather, prevents moisture penetration, and dramatically lowers your seasonal heating and cooling costs. The structural envelope includes exterior sheathing, high-performance insulation, house wrap barriers, and advanced fenestration.
-
Evaluating regional design pressures: Fenestration requirements vary widely by climate. In hurricane zones and severe wind regions, older annealed single-pane glass creates a massive failure risk; once high winds breach a window, internal air pressurization can blow roofs off their plates.
-
Installing laminated structural glazing: Replacing outdated windows with engineered impact hurricane windows gives your home 24/7 passive defense against windborne debris. These units feature heavy-gauge aluminum or reinforced vinyl frames paired with multi-layer polyvinyl butyral interlayers that resist penetration even when shattered, simultaneously reducing exterior street noise and filtering out harmful UV rays that fade hardwood floors.
-
Flashing and pan drainage: Ensure technicians install self-adhering sill pan flashing with back-dams around all window rough openings. Improper water shedding around exterior window trim remains one of the top causes of hidden wall rot in modernized homes.
Complementing primary window systems with secondary defensive barriers offers superior flexibility for seasonal control, privacy, and emergency readiness.
-
Selecting tailored shielding designs: Depending on your architectural style, choose between traditional side-hinged colonial options, tropical-inspired Bahama models that provide ambient sun shading, or motorized overhead roll-down units that retract flush into architectural soffits when not in use.
-
Precision masonry and framing anchors: Enlisting certified shutter installers guarantees that tracks, hinges, and tie-down anchors are mounted with appropriate fastener depth into foundational block or structural framing rather than merely surface siding, preventing structural tear-out during high-wind events.
-
Inspecting secondary thermal wraps: Before closing exterior trim around new openings, inspect the building’s drainage planes. Liquid-applied weather barriers or vapor-permeable house wraps should overlap outward shingle-style to direct incidental condensation away from the interior insulation.
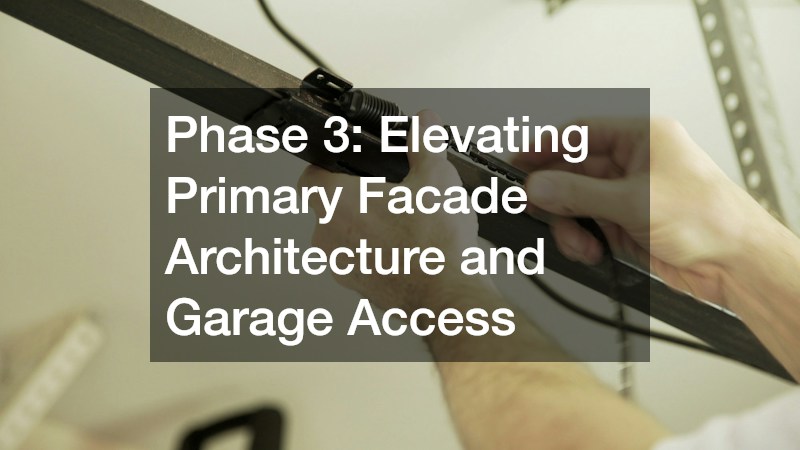
Phase 3: Elevating Primary Facade Architecture and Garage Access
Curb appeal is determined in large part by architectural balance. For many modern suburban homes, the garage door accounts for anywhere from twenty to forty percent of the front elevation. Leaving an old, dented, uninsulated door in place instantly dates an otherwise immaculate renovation. Upgrading the facade requires integrating functional access points with cohesive materials and clean sightlines.
-
Thermal performance and quiet operation: Modern residential garages are frequently used as workshops, gym spaces, or transition mudrooms directly adjacent to living zones. Upgrading to an insulated overhead garage door featuring dense polyurethane core insulation keeps ambient temperatures steady while dramatically dampening exterior sound transmission.
-
Selecting design-forward finishes: Modern panel designs have evolved far beyond basic stamped white steel. Opt for carriage-house wood overlays, clean-line anodized aluminum frames with frosted glazing, or flush steel designs with integrated vertical windows that match your home’s trim palette.
-
Modernizing motor and safety hardware: Pair the physical door with an ultra-quiet direct-drive or belt-driven opener featuring wall consoles, battery backup capabilities, rolling-code security, and smartphone connectivity for remote monitoring.
Tying the driveway elevation back into the main entryway creates a welcoming transition for visiting guests. Focus on small, high-impact details that unify the exterior aesthetic:
-
Architectural trim and siding contrasts: Combine modern fiber-cement siding with warm vertical battens or natural cedar accents around porticos to create depth and visual contrast across flat exterior walls.
-
Upgrading exterior illumination: Position exterior-rated light sconces at 66 to 72 inches above the finished entry threshold. Incorporate downlighting beneath garage eaves to cast warm architectural washes down textured surfaces at night.
-
Coordinating metal hardware: Align your exterior door handles, deadbolts, house numbers, mailbox, and overhead lighting with identical finishes, such as matte black, oil-rubbed bronze, or brushed stainless steel.
Phase 4: Transforming Primary Wet Spaces for Daily Luxury
Once the building envelope is sealed and weather-tight, work transitions indoors to the home’s most intensive utility zones: the bathrooms. These rooms yield some of the highest satisfaction and value returns on the market, but they also demand strict plumbing, venting, and waterproofing precision.
-
Reimagining flow and functional layout: Older homes often relegate owners to tight, poorly lit bathroom footprints. A successful modern bathroom remodeling plan frequently involves stripping walls to the studs, relocating waste lines, and creating dedicated wet zones that separate everyday grooming areas from luxury shower and soaking spaces.
-
Uncompromising moisture barrier assemblies: The longevity of any tile installation hinges on what lies beneath the surface. Replace outdated greenboard with cementitious backer units, foam shower pans, and continuous bonded sheet or liquid waterproofing membranes that run up wet-wall surfaces to completely seal off interior framing from moisture vapor.
The shower enclosure acts as the crown jewel of the modernized bathroom. Bulky framed enclosures with cloudy textured glass and pitted chrome framing can make even a large bathroom feel cramped and dated.
-
Enhancing sightlines and spatial depth: Specifying custom frameless glass shower doors transforms the primary bath into a bright, airy retreat. Heavy 3/8-inch or 1/2-inch tempered architectural glass eliminates the need for thick metal framing, drawing the eye directly through to intricate wall tile and custom niches.
-
Hydrophobic surface treatments: Request factory-applied or post-install polymer coatings on all shower glass surfaces. These treatments fill microscopic surface pores, causing water to bead and roll away while preventing soap scum, mineral deposits, and hard-water staining from etching the glass.
Phase 5: Executing Interior Finishing and Lighting Design
With structural revisions complete and wet spaces plumbed, the interior enters the finishing phase. This is where individual design choices coalesce into a unified aesthetic. The secret to achieving an upscale, designer look lies in uncompromising surface preparation; even the most expensive pigments and architectural trims look mediocre when applied over uneven drywall joints or rushed prep work.
-
Flawless drywall surfacing: Bring drywall seams to a Level 4 or Level 5 finish in rooms with abundant natural light. A skim-coat across the entire wall plane erases texture differentials between paper facings and joint compound, preventing visible tape shadows when direct light hits the walls.
-
Professional surface coating and color selection: Whole-house interior painting should follow a disciplined palette. Use washable-matte or satin sheens for primary living spaces to conceal minor wall irregularities while resisting scuffs, reserve semi-gloss or high-gloss enamels for high-contact baseboards, casings, and doors, and use flat finishes on ceilings to minimize light glare.
Lighting ties the finished interior together, providing flexibility for working, entertaining, and relaxing throughout the evening hours.
-
Implementing layered illumination plans: Move away from singular overhead fixtures in the center of the room. Instead, combine recessed downlights for general ambient illumination, directional gimbal lights to highlight artwork or architectural walls, and pendant fixtures or sconces to illuminate functional work planes.
-
Color temperature consistency: Maintain a cohesive Kelvin rating across all interior light sources. Warm white color temperatures between 2700K and 3000K evoke a comfortable, residential ambiance, whereas temperatures exceeding 4000K can feel stark, clinical, and visually fatiguing.
Phase 6: Revitalizing Grounds, Grading, and Curb Appeal
With heavy indoor construction complete and trade crews winding down, turn your attention to the outdoor grounds. The process of modernizing a home takes a heavy toll on surrounding terrain: heavy supply trucks compress soil profiles, utility trenches disturb subsoils, and foot traffic wipes out turf. Restoring the exterior landscape creates an immediate framing effect that elevates your architectural improvements.
-
Establishing functional site drainage: Before investing in ornamental planting, ensure the ground slopes away from your foundation footings at a minimum slope of six inches over the first ten feet. Direct downspouts into buried PVC lines that route stormwater away from walkways, driveways, and basements.
-
Executing integrated hardscaping and living beds: Hiring an experienced landscaping contractor ensures your site design harmonizes with your home’s exterior elevations. Skilled crews construct level flagstone pathways, build retaining walls that tame steep slopes, and install multi-zone drip irrigation systems that deliver water efficiently to root systems without oversaturating walls or foundations.
The final piece of exterior restoration involves reviving your lawn, transitioning it from a construction-trampled yard to a lush, healthy turf that frames your new driveway and entry pathways.
-
Relieving soil compaction: Heavy equipment crushes natural air pockets within the soil, depriving root systems of essential oxygen, water, and nutrients. Core aeration pulls small plugs of soil across high-traffic zones to open the profile and encourage deep root development.
-
Targeted soil amendments and nutrient delivery: Soil test results should guide your initial lawn recovery strategy. Applying a tailored soil fertilization program featuring slow-release nitrogen, phosphorus for root establishment, and potassium for stress tolerance helps stressed turf bounce back rapidly, filling in bare spots before aggressive weeds can colonize the exposed dirt.
Final Project Walkthrough and Seasonal Upkeep
A comprehensive whole-home modernization is a massive undertaking, but following a structured sequence transforms a stressful process into a rewarding journey. By taking the time to properly establish the jobsite, fortify the exterior building envelope against weather extremes, update high-traffic entryways, redesign interior wet rooms, and revitalize the surrounding landscape, you create a home that is functional, beautiful, and built to last.